

Welcome to your Moneymgmt portal! It’s your command centre for keeping track of your finances and collaborating with your finance professional to achieve your goals.
Introduction: About your wealth portal
Your wealth portal has 6 sections: Wealth, Cashflow, Protection, Goals, Team and Docs. Each section serves a specific purpose.
– Wealth is where you can keep track of all your assets and liabilities.
– Cashflow helps you understand your spending habits
– Protection is designed to house your insurance and estate planning
– Goals helps you set financial targets and stick to them
– Team is a list of all the people and entities that play a role in your financial life
– Docs gives you a comprehensive list of all the files you’ve uploaded to the portal, and is a convenient place to upload new ones
Beyond these 6 sections, your portal has many other features designed to help you keep your finances on track, like the ability to create tasks (called To-dos) and a dedicated Tax Assistant to help you get your finances organised ahead of tax time.
This quick guide walks you through the basic steps to get your account up and running. When you’re done, take time to explore and discover everything else your portal has to offer.
And if you haven’t already, don’t forget to download the app, for easy access to your entire financial world on the go.
Step 1: Add your team members
Start by entering your team members in the Team area of your portal. Team members can be family members and finance professionals, as well as entities such as self-managed super funds (SMSFs) or trusts. Personalise your Team by uploading profile pictures for everyone!

Step 2: Add your wealth
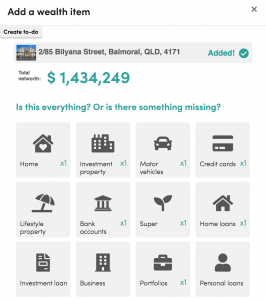
Next, navigate to the Wealth section of your portal enter your assets and liabilities (what you own and owe). Start by adding your property – enter your address and the portal will find it for you!
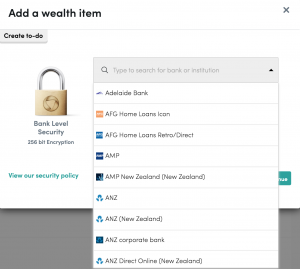
When you’re ready, enable bank feeds to see live balances and transactions for your bank accounts, loans, and investments.
If any of your assets or liabilities, such as a property or loan, are co-owned with another person or entity, you can assign split ownership within the portal to ensure your personal net worth is accurately represented.
Step 3 – Customise your cashflow
From the Wealth area, move down to the Cashflow section to see a list of your transactions auto-categorised to give you a breakdown of your spending.
You can change how the categories are broken down and create new ones under the category menu. You can also re-assign a transaction by clicking on the category and selecting an alternative.
You also have the ability to tag transactions with tax tags. This makes it easy for you to group them thematically using filters and save important ones for later.

Step 4 – Create goals
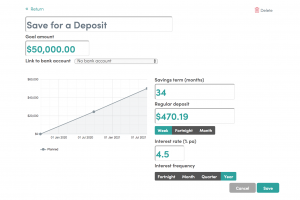
Next, expand the Goals area of your portal. Create savings and debt reduction goals and link them to your bank, loan, or credit card accounts to track your progress, as well as receive notifications if your progress falls behind.
Step 5 – Upload documents
Store all your important documents securely in the cloud by uploading your will, tax summaries, important receipts and more in your portal. Documents are part and parcel of how the portal operates, so you can attach them to specific sections (e.g. the Protection area) or wealth items (e.g. your property, bank account, etc.).
By keeping them organised, they’ll be easily accessible when you need them!

Step 6 – Take stock of your financial position
Now that you’ve got an understanding of your net worth, let your finance professional know how they can assist you moving forward by completing the 1 min financial review. The financial review is located on the portal dashboard.

Step 7 – Create To-dos
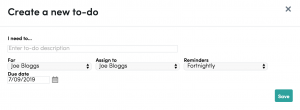
Missed anything? Create tasks and set reminders with To-dos so you can come back to it later. To-dos can be created throughout the portal – from individual wealth items to their command centre in the Goals area.
And that’s it! Your Moneymgmt portal is now ready to go. Check in every few weeks to update your data and generate reports for a comprehensive view of how your finances are evolving.